Roasting Coffee at Home: A Beginner’s Guide
Have you been curious about what it takes to be your own coffee roaster, and how to start roasting coffee at home? We’re going answer those questions and much more in this article!
Let’s start by addressing the most basic question: Why roast your own coffee at home? There is certainly no shortage of delicious commercially roasted coffee available on the market. Well, you could be living in an area of the world where fresh roasted, specialty coffee is difficult to come by. Maybe you’re looking for a deeper connection to the coffee you brew. Or maybe you simply find the three times savings of buying green (unroasted) coffee compelling.
In any case, home coffee roasting can be fun and rewarding. It’s also easier and less expensive than you probably think. Now, you won’t be giving commercial roasters a run for their business any time soon, but you’ll definitely be roasting enjoyable coffee and impressing your friends in no time.
Which Coffee Roaster is Best for Home Roasting
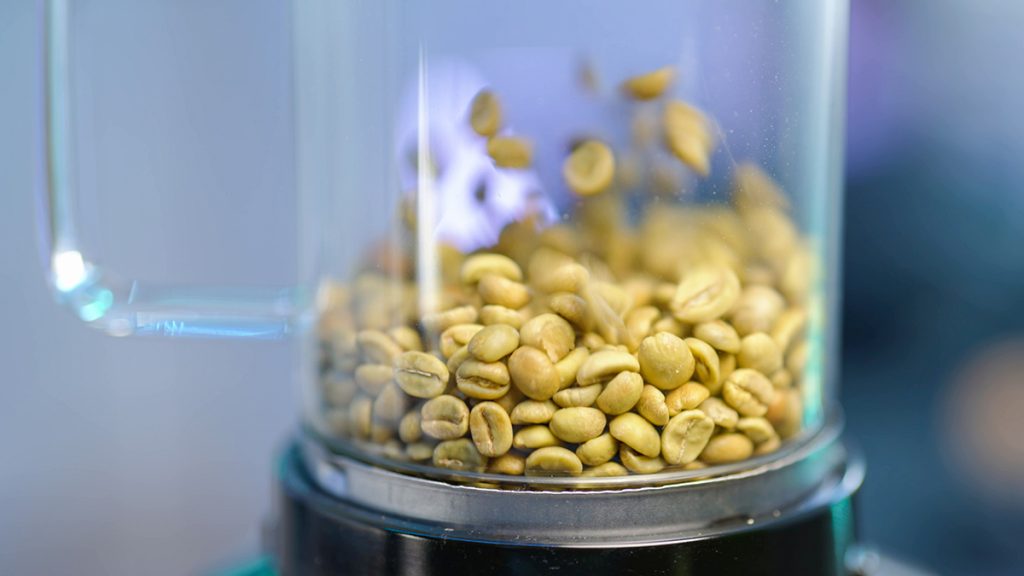
Let’s talk about selecting the home coffee roaster that is right for you. Roasting coffee on the most basic level can be accomplished by spreading raw, green coffee across a pan and baking them in the oven, browning them in a skillet, roasting them in a colander over a heat gun, or the barbeque. But of all the rudimentary ways to roast, perhaps the easiest to get started with is a popcorn popper. Out of the box, though, popcorn poppers offer little to no control over variables such as temperature and airflow, and they send chaff flying everywhere.
There are so many great home coffee roaster options on the market, and there are new ones popping up frequently. Here are some of our recommendations at different price points:
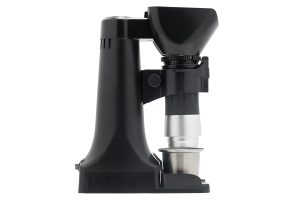
- Popper from Sweet Maria’s ($90) – This is a much better budget option than a traditional popcorn popper as it decouples heat and fan speeds allowing you to make adjustments on the fly. It also has a chaff collector, saving you from having to clean up a big mess after you roast.
- Hive Roaster ($75) – This coffee roaster is a skillet designed to be shaken in circular motions over a heat source to agitate and evenly roast the coffee.
- Fresh Roast 540 or 800 ($209-289) – These are great options if roasting at home seems like something you’ll stick with. Like the popper, these are fluid bed roasters using convection to heat the beans. They offer a higher capacity though, as well as more control.
- Behmor 2000AB Plus ($479) – The Behmor is a drum roaster that not only gives you the option to roast manually, but also comes with pre-programmed profiles. Another nice feature is the exhaust fan. A properly ventilated roasting chamber will keep smoke buildup inside from ruining your roast.
A wide array of home coffee roasting options are available on the market – just be sure to do your research both on the manufacturers’ websites as well as on the various roasting forums online before pulling the trigger on a home roaster.
At this point in your home coffee roasting journey, the choice will probably come down to your budget, and how much coffee you need roasted each time. On that note, know that roaster manufacturers tend to exaggerate. As a rule of thumb, count on the best roasts happening with batches at least 30% below whatever they say their product is capable of. Also remember that measurements are based on the weight of green coffee going in. By the time you are finished roasting, the coffee will have lost between 12-21% of its weight, depending on how dark you roast your coffee. Do some quick math and consider the coffee consumption in your household. How often will you have the time to roast? Are you ok with roasting a couple batches back to back, or do you want it all finished in one go?
Picking a Fluid Bed or Drum Coffee Roaster
Coffee Roasting Terminology and What it Means
Let’s cover some of the basic terminology of coffee roasting.
- Charging – to load your roaster with green coffee.
- Charge Temperature – the start or preheat temperature of your roast.
- Batch Size – the amount of green coffee being loaded.
- Drying Phase – the first third of the roast that is spent evaporating the moisture inside the beans.
- Browning Phase – the middle third of the roast, where the more interesting caramelization and Malliard reactions occur. These reactions are responsible for a lot of the aromas present in roasted coffee.
- First Crack – the chorus of beans bursting at their seams to release the buildup of water vapor they can no longer contain.
- Second Crack – similar to first crack, but this time it is the buildup of Co2 that the beans can no longer contain. The sound is softer than the crackling during first crack, due to weakened and more brittle bean cell structure.
- Development Phase – the last third of the roast, starting at the onset of first crack, and ending when you conclude the roast.
- Dropping the Coffee – ending the roast by either literally dropping the coffee out of the roasting chamber and into a cooling tray, or in some roasters by turning off the heat and cranking up the fan to cool the coffee inside the chamber. If you don’t actively cool the coffee when it is done roasting, it will keep cooking or “coasting.” Ideally, you bring the coffee down to body temperature in as little as 4-6 minutes to prevent coasting.
- Drop Temperature – the temperature at which you stop the roast
How to Source Your Green Coffee for Home Coffee Roasting
Once you sort out the coffee roaster that’s right for you, it’s time to start shopping for coffee to roast! You’ll find green coffee available across the internet. Be mindful when researching suppliers and understand that quality and standards run the gamut. Some of what is being sold to the consumer market may be what the commercial market has rejected.
Coffee starts to fade, no matter how carefully stored, within 6 months of harvest. Most transparent suppliers will list the arrival date of the coffee. If you’re not seeing that date posted, be wary and at least ask for more information. There are also green coffee defects which can be hard to spot at first glance, or before you have already roasted the coffee. Stick to reputable companies with a long track record and great reviews when starting out since you won’t be as practiced at spotting defects to know you’re being swindled.
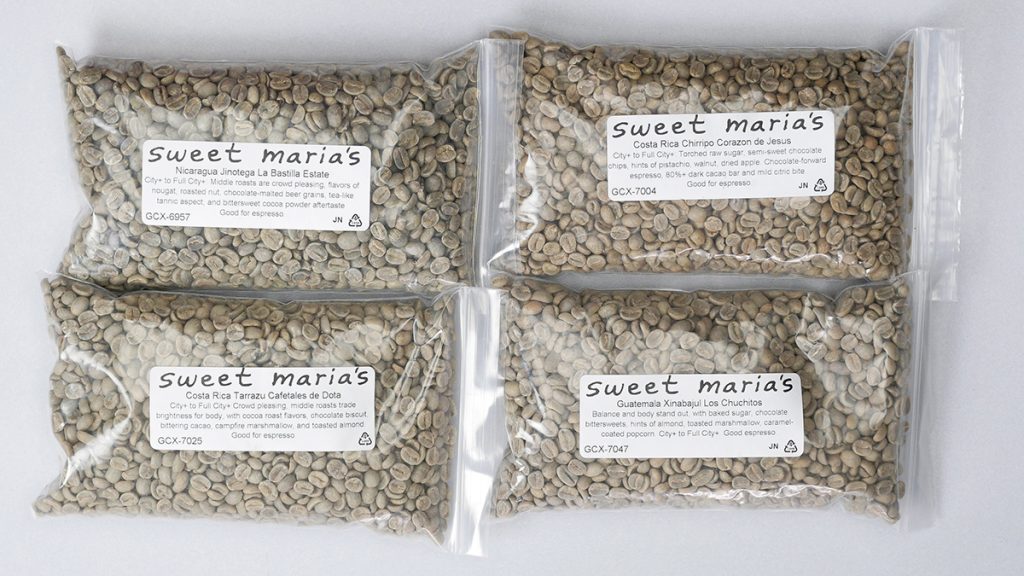
Sweet Maria’s has been in green coffee business for more 25 years, and they have been publishing educational content for all that time! Their Coffee Library and YouTube channel are a treasure trove for budding roasters learning the ropes. Their green coffee listings include a wealth of information about the coffee being offered, its producer, the region it was grown in. They also share their cupping scores for each coffee, along with their roasting recommendations and an array of descriptors that make it easy for you to select the coffees that align most with your preferred brew method and your taste preferences.
The best you can hope for when roasting coffee is to highlight the intrinsic qualities of the seeds. If it’s an earthy, low acid coffee from Brazil or Southeast Asia, there’s literally nothing you can do in your roast to conjure up bright floral or fruity flavors. These attributes are a product of the terroir – the climate, soil, and elevation that they were grown, as well as the processing method used at the plant. Wet process, dry process, honey pulp natural, and wet hulled processes will all bring out different characteristics of the coffee.
If you’re wondering which origins to get started with, the following list highlights some of the general flavor characteristics of coffees from different continents/countries.
- Earthy/Savory with muted acidity: (Asia) India, Java, Sumatra, Yemen [wet hulled process]
- Chocolate/Nutty with medium or mellow acidity: Brazil, Mexico, Nicaragua, Hawaii, Honduras, Jamaica [dry & wet process]
- Sweet Fruit & Floral with crisp acidity: (Americas) Costa Rica, Ecuador, El Salvador, Guatemala, Peru [wet & honey process and pulped natural]
- Tart Fruit & Berry with bright and sparkling acidity: (East Africa) Ethiopia, Burundi, Kenya, Rwanda [dry process]
How to Plan for Your Coffee Roast
It’s good to have a plan as you approach your roast. Are you focused on preserving origin characteristics in the coffee or do you want to introduce more of the roast flavors? Are you roasting a high elevation washed coffee or a low elevation natural? While the first can take high preheats and a lot of gas out of the gate, the second generally fares better with a lower and slower approach.
Another important consideration is whether you want your roasted coffee to shine as a filter brew, or as an espresso. The filter approach typically focuses on preserving acidity and origin characteristic while avoiding introducing roast flavors. The espresso approach, on the other hand, usually takes into consideration that it should perform just as well straight as when paired with milk or a dairy-free alternative. A little extra development will help to tame the acidity and add some mild roast flavors as well as body. This usually improves the chemistry with milk-based drinks.
If you’re roasting coffee with a popcorn maker, skillet or barbeque, you have only your sight and smell to tell you how much heat to apply, and when to cut it. Fancier coffee roasters may come with probes and software that can track and log, as well as calculate derivatives and percentages that help inform how the roast is progressing. You should definitely use all the available data your roaster provides, but don’t allow yourself to get so disconnected from the coffee or reliant on the technology, that if it were to all leave you at once, you wouldn’t know how to manage your roast.
As we think about managing our coffee roasts, it is important to note a couple of things we want to avoid. One of these is “baking” our beans in the roast. Roasts that progress too slowly, tend to stall or crash because not enough heat is applied at the right time to carry the roast into and out of first crack. These roasts can end up tasting baked (flat, papery, and grain like). We also want to avoid tipping and scorching our coffee in the roast. Tipping happens when the tips of the beans are roasting faster than the middle. This is usually because too much heat has been applied too fast. Scorching happens when the drum is too hot at the time you charge the roast, or you have overloaded the roaster and the beans are not able to mix quickly enough, leaving the beans in contact with hot surfaces long enough to char. It is also important to understand that while you might be having success with a certain batch size with one coffee, when you switch to a different coffee (that might be denser or larger), you might actually have to reduce the batch size to prevent overloading your coffee roaster.
Another thing that you generally want to avoid in coffee roasting is second crack. Ideally, you will only experience second crack once or twice, and only by accident. You should attend to the roast well enough to drop it prior to this moment. Second crack is where carbonization is occurring, and by that time you’ve roasted all of what makes the coffee unique out of it. The flavors that you will experience from coffee roasted to this point are heavy roast flavors like ash, smoke, and molasses. The oils within the beans have been driven to the surface, which leads to rancidity as the oils are exposed to oxygen.
To sum up this section, the basics of thinking through your roast are as follows: You apply heat to the coffee seed as fast and as evenly as possible, moving them through the three phases of drying, browning, and development, while avoiding roast defects along the way.
How to Analyze Your Coffee Roast
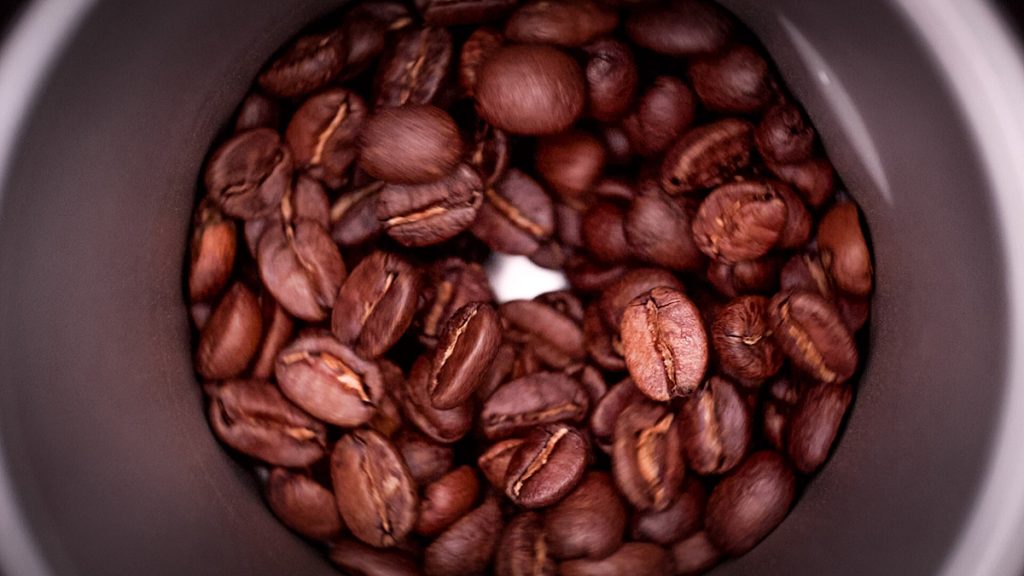
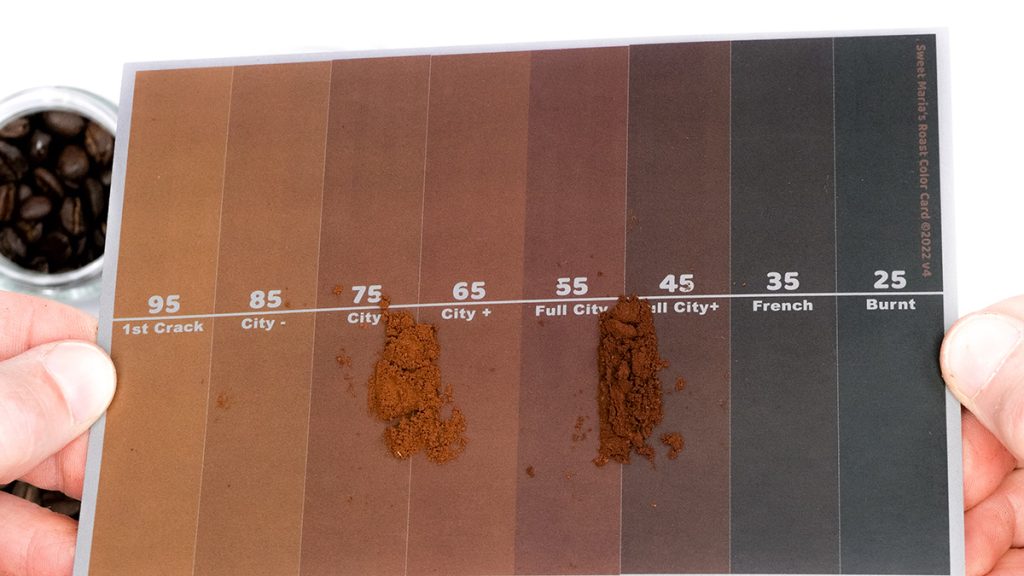
A good starting point can be to select a coffee you love from a commercial roaster and then aim to approximate the color of that finished coffee from the roaster. It’s imprecise to be sure, but we need to start somewhere. Also, it’s worth pointing out here that what specialty coffee calls dark, non-specialty calls medium, so it’s best to calibrate with something more precise than descriptors like medium, medium-dark and so on.
Here are a couple of product recommendations to standardize the way that you calibrate your roast, and the way that you are able to discuss and compare your roasts with others. To use either of these, you need to grind a couple grams of coffee first, in order to get the average of the color obtained from the roast.
- Roast Vision from Espresso Vision ($300) – this tool offers roast level analysis with accuracy on par with solutions costing two to five times as much. It also wastes far less ground coffee to obtain a reading. At $300, it is best suited to the most discriminating home roaster, or someone who has decided to give small batch, commercial roasting a try.
- Roasted Coffee Color Card from Sweet Marias ($3.00) – these roast level color cards are best suited for the more casual home roaster, who wants to analyze roast level without breaking the bank.
With all of this in mind, remember that color is only one variable. Two different coffee roasts can be exactly the same color, while arriving at that color through very different roast profiles. Variances can be due to different types of roasters (fluid bed vs. drum roaster), batch size, preheat temperature, batch to batch protocol, and how you drive the roast with the heat and air. The more data points you have, the more easily you can determine similarities and differences between two seemingly identical roasts.
Home Coffee Roasting Recommendations
Strive for Consistency in Your Home Coffee Roast
Master the Basics of Home Coffee Roasting
Use Coffee Beans from Regions You Are Familiar With
Home Coffee Roasting for Blends
Cupping Your Home Roasted Coffee
Rest Period for Your Home Roasted Coffee
How to Store Your Home Roasted Coffee
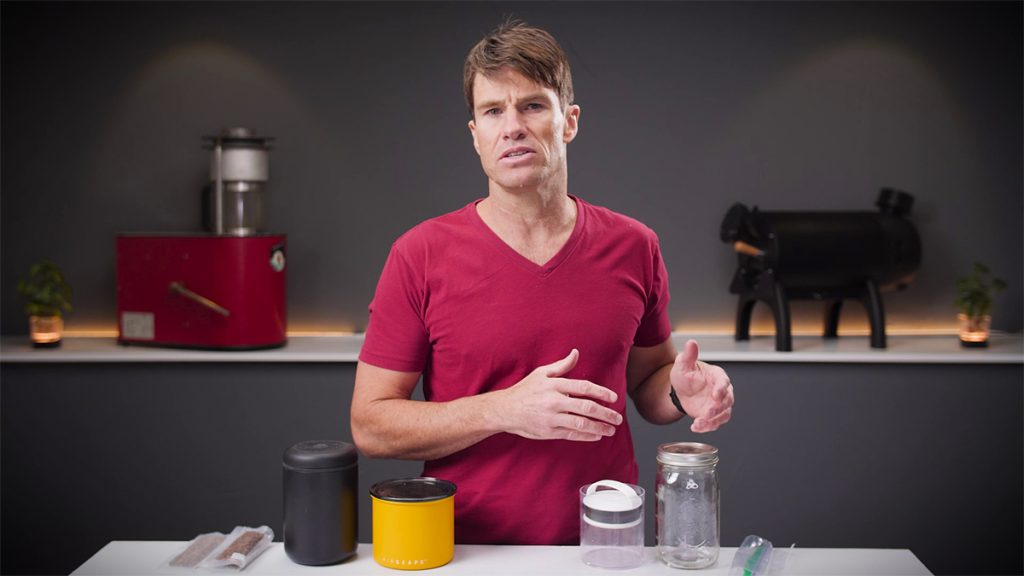
When deciding on how to store coffee that you have roasted, a few key factors that you need to consider are oxygen, moisture, heat, and sunlight. You want to keep your coffee away from these elements as you store it, and below are a few recommendations for products that will help you do that.
- Airscape Coffee Canister from Airscape ($30-40) – The Airscape uses lids with seals and one-way valves that you can push down as you draw down the coffee, eliminating head space.
- Atmos Coffee Canister from Fellow Products ($30-40) – The Atmos has a vacuum mechanism to remove air from the container to slow down staling. The trade-off for a lower oxygen and moisture environment is that the negative pressure created by the vacuum effectively speeds up the aging process by accelerating the rate of degassing and diffusion of VOCs. For home roasters, it’s kind of good thing, because you’ll find you’re almost always running out of coffee and forgetting to roast until it’s too late. Since you don’t want to brew coffee that hasn’t properly rested, the Atmos might be just the ticket to keep you in the game of brewing when your roasting game is slacking.
Whatever you choose, aim to protect your coffee oxygen, heat, moisture, and sunlight by keeping it stored in a cool, dark and dry environment. It is also helpful to minimize the amount of headspace and prevent air exchange.
Happy Roasting and Brewing!
We hope this information was helpful for you as you start out on your home roasting journey! Good luck in your roasting endeavors, and happy brewing! Speaking of brewing, there’s no better way to extract your new roasted coffee than with a Flair Espresso Maker.