Brew Guide
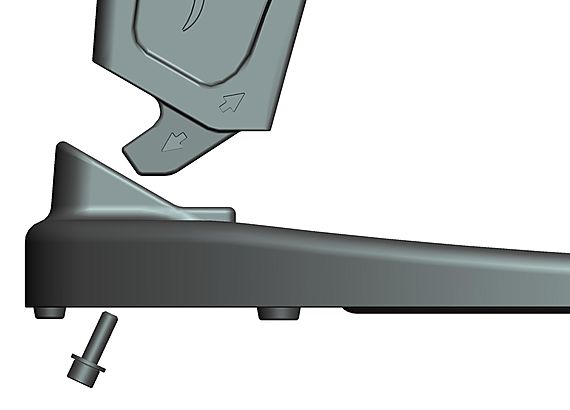
Q: The bottom of my PRO/PRO 2 lever assembly does not sit flush on the oval base. There is a gap between the two pieces, and I can’t screw in the included bolt to affix the lever assembly to the oval base.
A: It is normal to have a gap between the lever assembly and the base. If it is completely flush, the tab may not be supported on the sides and wobbling may occur. The bolt needs to be inserted at an angle, roughly 30 degrees from parallel, as can be seen below, to the orientation of the tab at the bottom of the Lever Assembly. Please note, the Flair works safely without the little bolt and we only recommend its use only if you plan to keep your Flair permanently assembled.
Q: My pressure gauge is turned in a position that is difficult to see while I’m brewing the shot. What should I do?
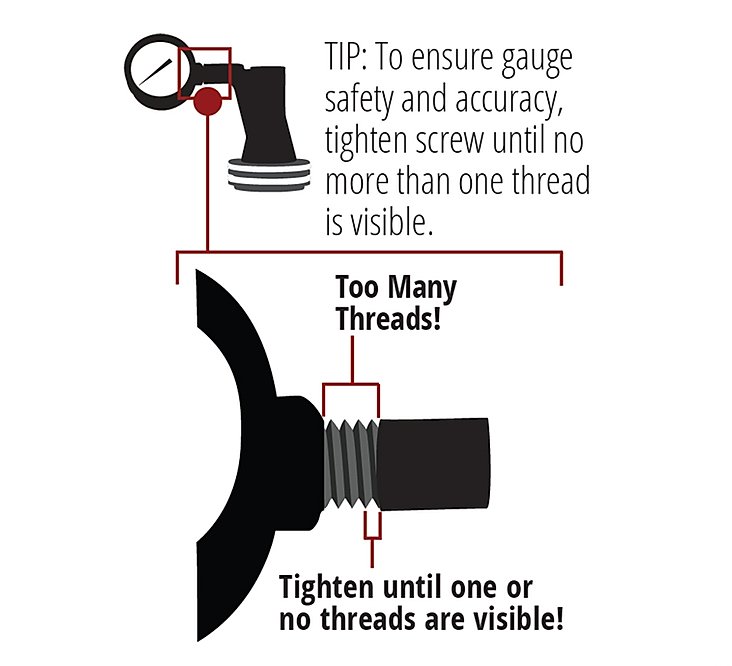
A: The gauge is user adjustable. Turn it counter clockwise until it provides a good viewing angle. Do not unscrew the gauge more than a full turn.
Q: I pulled a shot and the Cylinder of my Brewing Head is lifting up, like it is trying to separate from the Portafilter. What should I do?
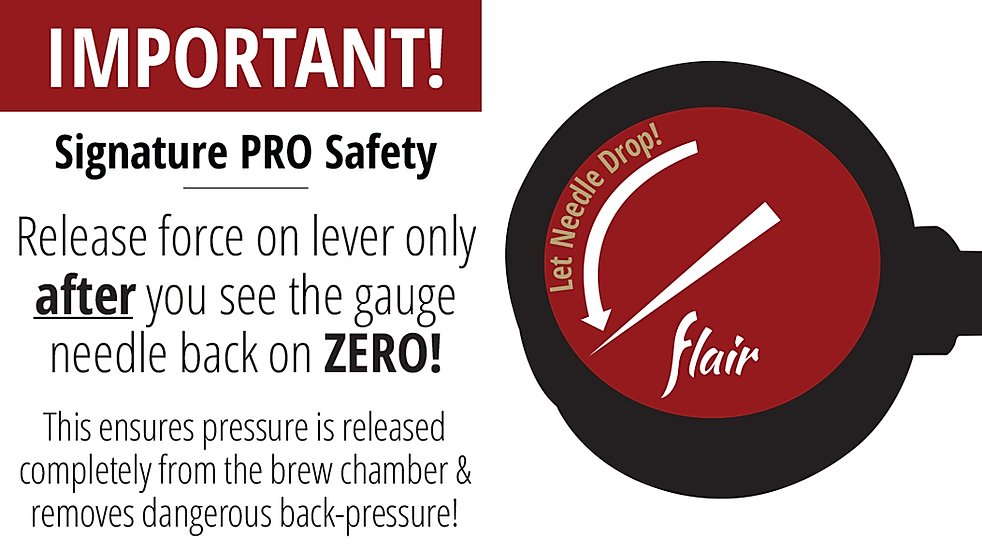
A: It is normal to see the cylinder lifting a small amount towards the end of the shot, especially if you are brewing at higher end of the “Espresso Zone.” The Flair provides manual, pressurized brewing. Once you begin to lower the lever, pressure builds in the chamber, which you can read on your pressure gauge. You should not exceed 10 BAR and never push the needle beyond 12 BAR! The best tasting espresso with the most crema is usually found within the operating range of 6-9 BAR. It is important to never release the lever until the gauge reads zero. This allows all pressure to dissipate naturally.
Q: I pulled a shot and there is coffee spilling all over from between the cylinder and the portafilter. What’s going on?
A: Coffee spilling/leaking in between the cylinder and portafilter is not normal and should not happen. While brewing with your PRO/PRO 2, you need to continue to hold the lever firmly until you see the needle drop back to zero. Then slowly release the lever.
Q: I want to use less coffee in the portafilter but when I go to tamp, I cannot get the tamper far enough in to compress the coffee, what’s wrong?
A: There is nothing wrong with your Tamper or Portafilter, but your coffee dose is too low. The PRO Brew Head is designed to brew only double shots: minimum dose is 16 grams (depending on the bean used); and maximum dose is 24-26 grams. The PRO/PRO 2 will not perform well outside this range.
Q: Why is there coffee spurting from the portafilter when I start to pull my shot?
A: If the squirts are small and last no more than 10 seconds, this is a normal part of naked brewing with the Flair PRO or PRO 2. Remember, the bottomless portafilter is a diagnostic tool to help you understand how even your extraction is. This “jet effect” can indicate one of two things: first a partial occlusion of one of the openings in your filter basket, or second channeling in your puck. While there is little to do to fix a partial occlusion besides modifying your grind size, channeling occurs when there is uneven distribution of your grounds and brew water flows through one area faster than others. This can be solved by good distribution techniques and pre-infusion.
Q: Why isn’t there a bundle set for the PRO or PRO 2? How can I get another brew head?
A: Purchasing a second brewing head for your PRO or PRO 2 is as easy as heading to our PRO Accessories Page and selecting between either the Second Shot Kit – PRO 2 or the Second Shot Plus Kit – PRO 2. Both come with a second portafilter and will easily facilitate brewing a second shot.
Q: Which accessories on the website are compatible with the PRO/PRO 2?
A: The Flair PRO/PRO 2 is quite a different design from the Classic and Signature, and as such is not necessarily cross-compatible mostly due to the larger size of the PRO/PRO 2 brew head components. Currently, any accessory listed on the accessories page of our website that only says “Classic/Signature” is not compatible with the PRO or PRO 2.
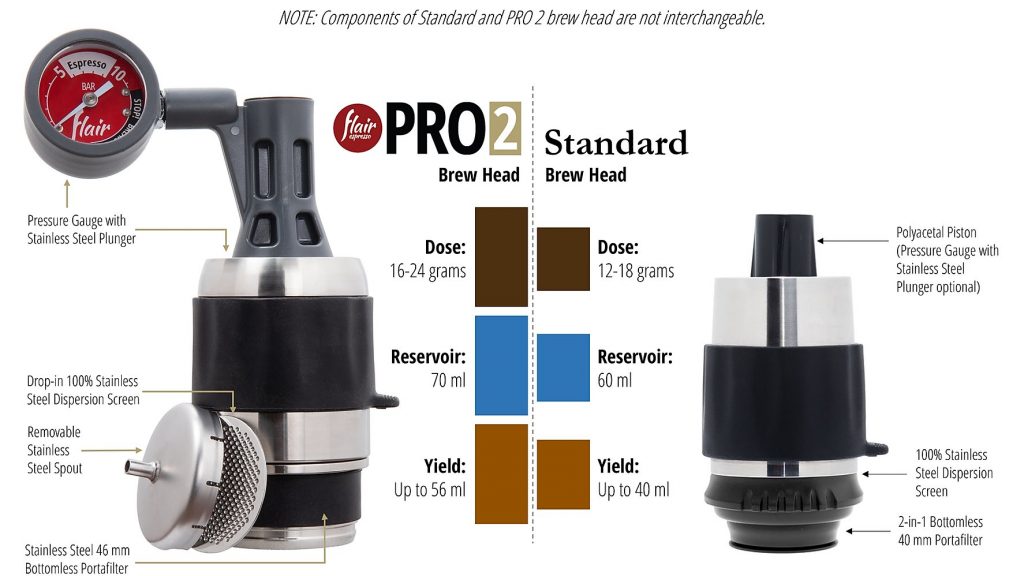
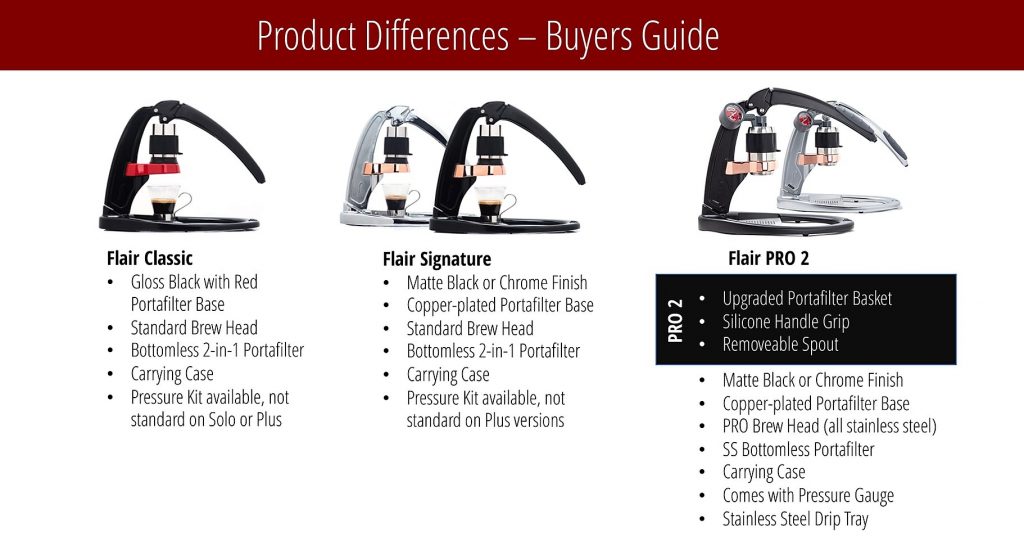
Q: What is the real difference between the PRO 2 brew head and the other brew heads for the Classic and Signature models?
A: The Classic and Signature espresso makers use what is called our standard brew head. The Flair PRO 2 uses, you guessed it, the PRO 2 Brew Head. In addition, the PRO 2 has an integrated pressure gauge, all stainless-steel brewing cylinder and portafilter, and a larger capacity in terms of dose, brew water and output. Please see the image for a better understanding of these differences.
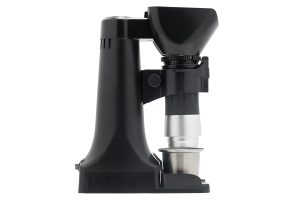
Q: What are the differences between all Flair models? Which should I choose?
A: All Flair models are built with the same solid aluminum components as the original Flair. Both the Classic and Signature models utilize our smaller, standard brewing head and come standard with a bottomless 2-in-1 portafilter. Another difference between the Classic and Signature lines is that the Signature models go through a process of hand polishing due to the Chrome, Cool Black Matte, and Copper finish. The PRO series comes in the same colors as the Signature line, but features our larger PRO 2 brewing head, a pressure gauge and other upgrades! See below for more information.
Q: I’m pulling hard on the lever, the gauge is reading 10 BAR or more and still no coffee is coming out or it’s flowing too slowly. Please help.
A: Your grind is too fine. You need to stop the pull and start again BUT you cannot just let go of the lever! This is pressurized brewing, and you’ve built up pressure in the system that was not able to bleed as it normally should—making espresso. IMPORTANT: you need to grip the cylinder and press it down as you release pressure on the lever or else it will rise and spill water and coffee. After you lift the lever, while still holding the cylinder with the other hand, pull up on the stem of the piston to release the pressure. Once you have you can now remove the brew head from the portafilter, tilt it upside down over the sink to drain remaining water, and proceed to prepare for another shot.
Q: I want to stop my pull early, when I have the desired amount of coffee in my cup. But what do I do with the rest of the water in the chamber?
A: When brewing you can terminate the extraction at any point you wish BUT you must ensure that the needle on the gauge reads ZERO before releasing force from the lever. Since there will still be residual pressure in the system until you expel all the water from the brew head, you need to hold the lever still once you reach the desired yield and replace the cup with another to complete the pull and release remaining pressure.
Q: The needle on my pressure gauge is stuck or appears to not be responding correctly to the force applied to lever.
A: The port is blocked and you will need to back-out/unscrew the gauge ¼ to 1 full turn but no more, until you find a good viewing angle. For best, most accurate results, make sure that no more than one thread is visible before brewing.
If you still have questions please contact us via the form below or at service@flairespresso.com.